SQL 2012 Installation on VM MS Cluster nodes.
October 13, 2015 Leave a comment
SQL 2012 Installation on VM MS Cluster nodes.
To install Microsoft SQL 2012 on a cluster is not a difficult task however if we should do some real technical consideration then it will be reliable and will make your day if it is in production. For this installation I will use the Windows 2012 R2 Cluster which I have created earlier and if you want have a look on my post related to cluster configuration on VM. I don’t want to go into more details about the setup and so called theory… We will go live and feel the SQL cluster setup on VM nodes.
It was told that for the real SQL server we need to have at least 4 separate volumes (drives), like Database, Log, MSDTC (Distributed Transaction Coordinator) and System and Temp Database respectively. They even said it is recommended to have Temp and System database on separate Drives. However, for MSDTC it is still “debates” are going whether to keep in local or clustered, for Windows 2008 onwards Microsoft declared to keep in local nodes in a cluster or again if it is required you can have a cluster MSDTC also. We will discuss it later in the article.
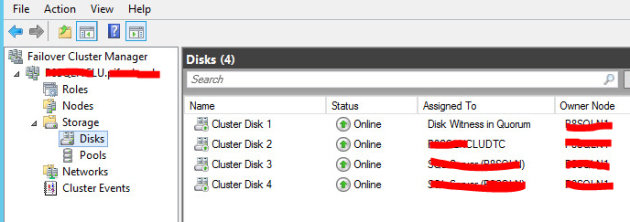
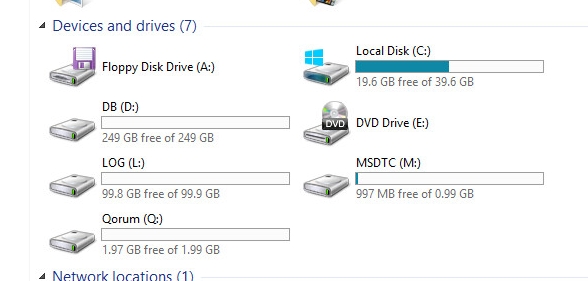
Move all the resources to Node1

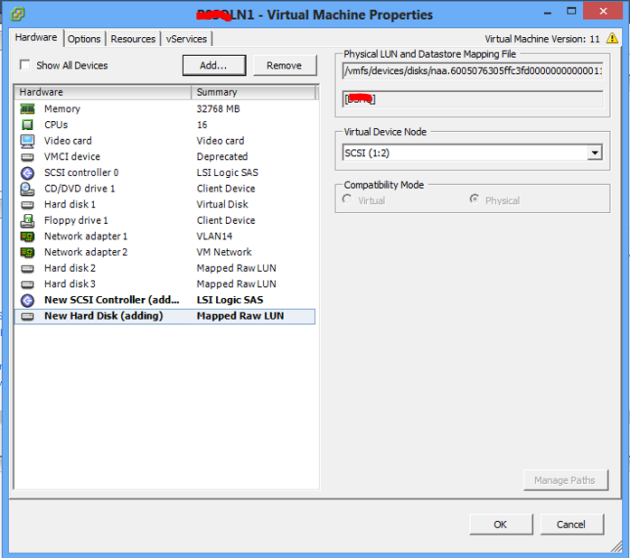
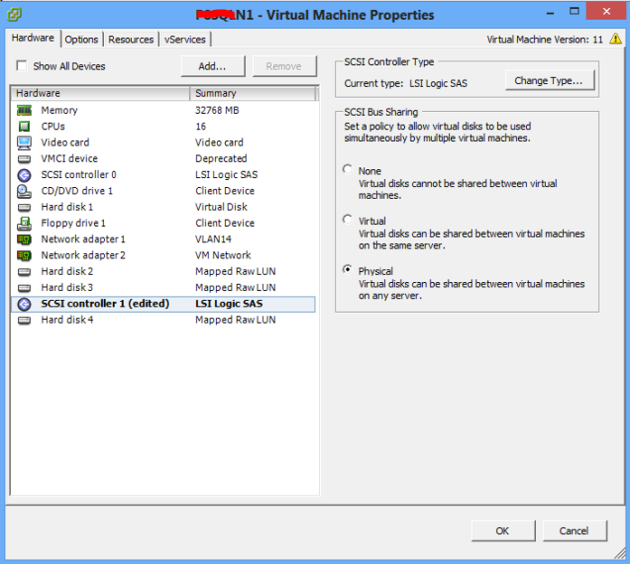
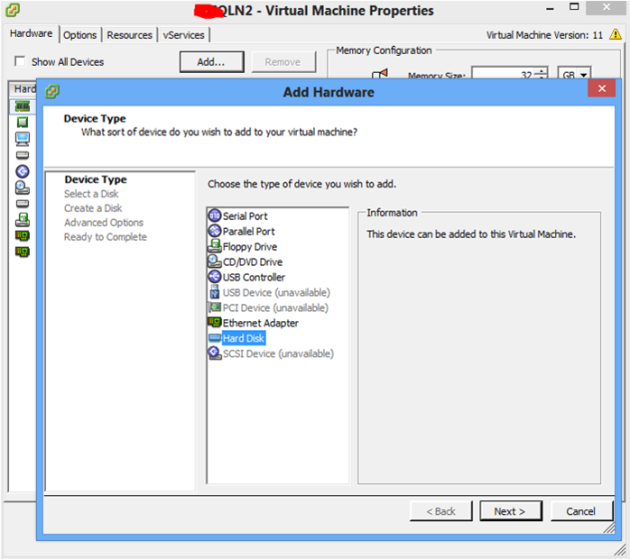
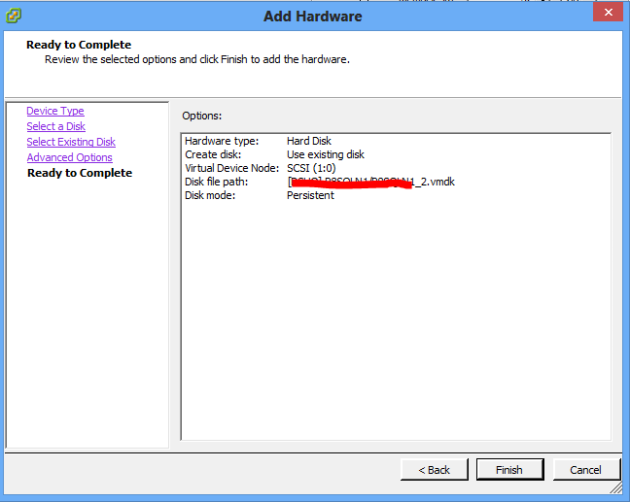
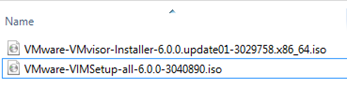
Confirm all the drives are available on node1 and also the SQL 2012 installation media

Select New SQL Server failover cluster installation from Installation Center.
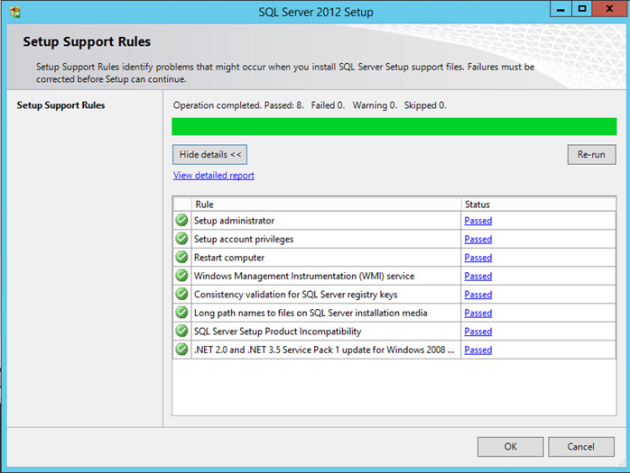
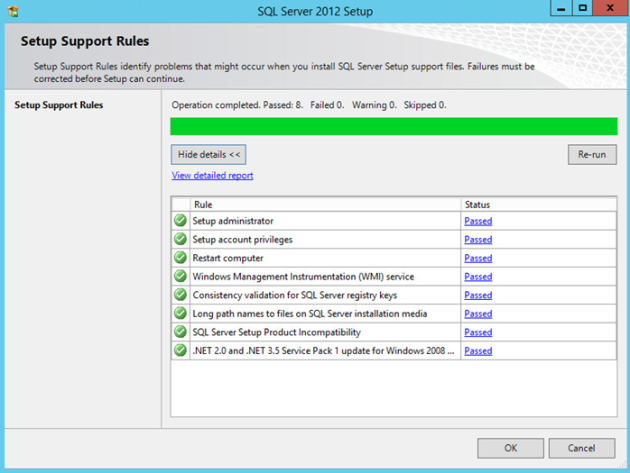
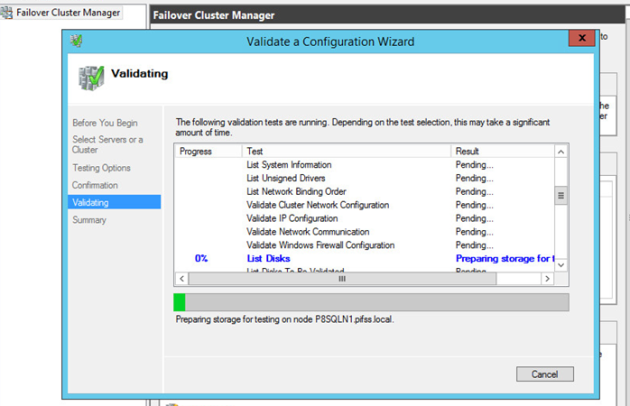
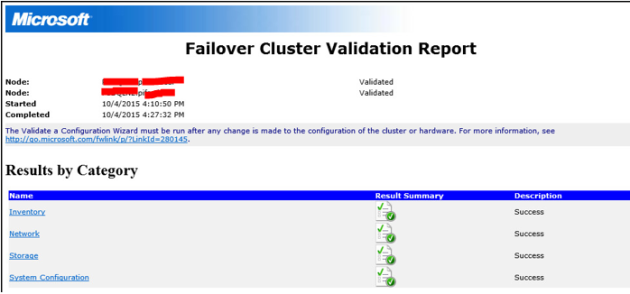
Setup will check all the problems that can be occur when you install SQL. And it also installs the setup support files. If there is any error or warning, follow the fixes and rerun the checks. And click OK

Enter the product key or evaluation and click Next.

Accept the license agreements and click Next.

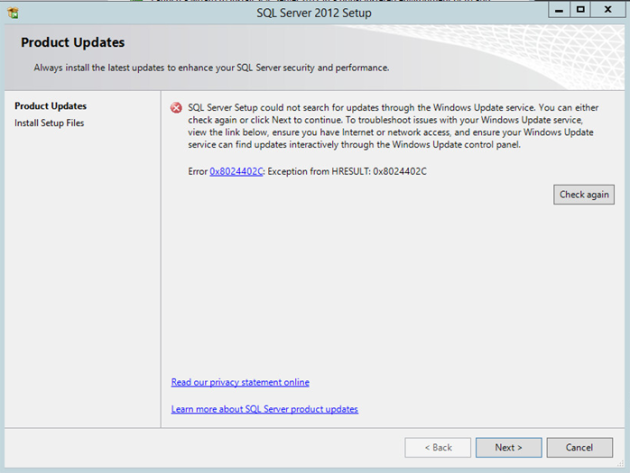
If you have internet connectivity the setup will search for new latest update for the SQL version which you are performing to install on this cluster. And click Next.
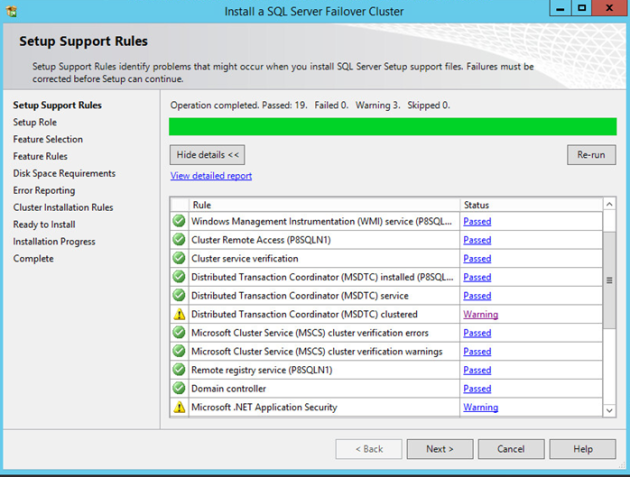
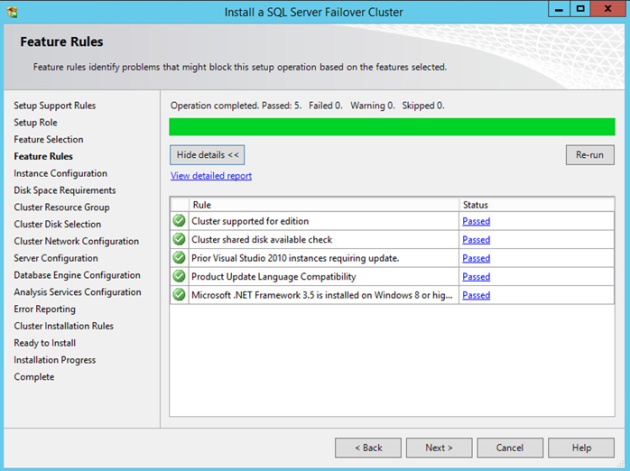
Here in setup, it will identify problems that might occur when you install SQL. This is one of the check point where the setup will inform us and you can check the status of the issues and correct and fix accordingly. It is good to fix the warning but certain warning can be ignored if it is known and accountable.

I have mentioned in the beginning of this article about MSDTC so it is clear about MSDTC service in Windows 2008 server. On cluster configuration. Look on the links below and decided whether it is required or not.
https://technet.microsoft.com/en-us/library/cc759136(v=ws.10).aspx
https://technet.microsoft.com/en-us/library/cc730992(W.S10).aspx
Select the SQL Server feature Installation radio button and Next.
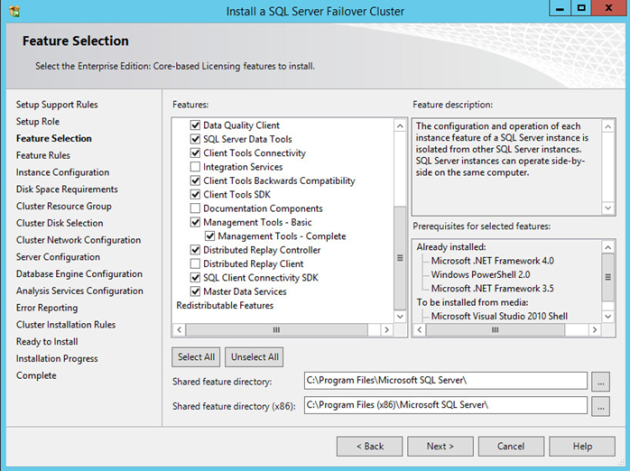
Choose the core components and the features to install and if possible you can change the installation directory form “C:\” to any other location which is recommended for larger installation. Click Next.
After the component selection, setup will again identify problems that might occur based on the component and features selection. And then click Next.
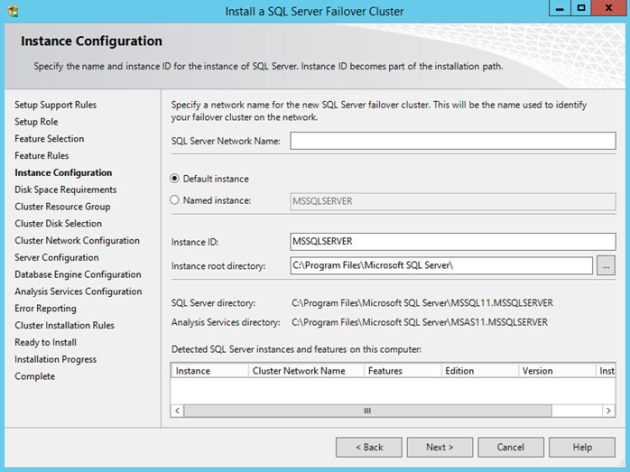
Here you can select the default instance name which is MSSQLSERVER. But if you select named instance then you can specify a name for your cluster instance. Here the difference is very simple, if you use default instances you can access the SQL by using the Computer Name (hostname), on the other hand if it is named instances then you will be able to access SQL by typing Computer name\SQL instance name. If you’re install one SQL Server on this machine, go with a default. If you’re planning on multiple instances, go for named instance. There’s no major difference. The benefit of the default instance is that you connect just by specifying the server name whereas a named instance will require an instance name as well. Click Next to continue.
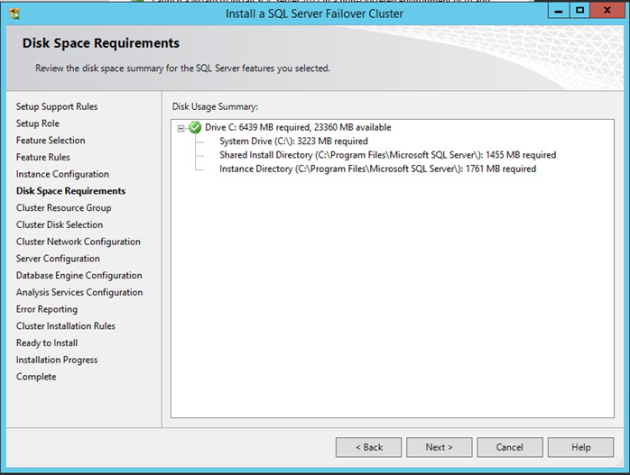
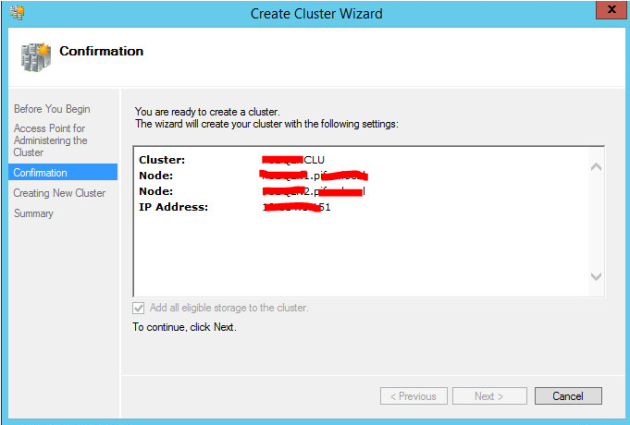
Check the summary and click Next.

You can use SQL cluster resource group name here and Click Next.
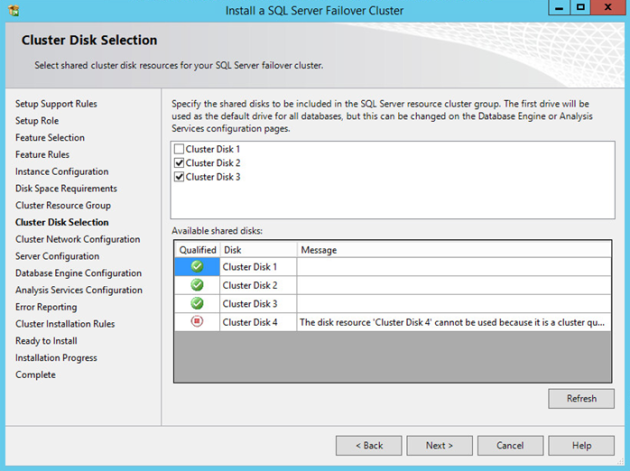
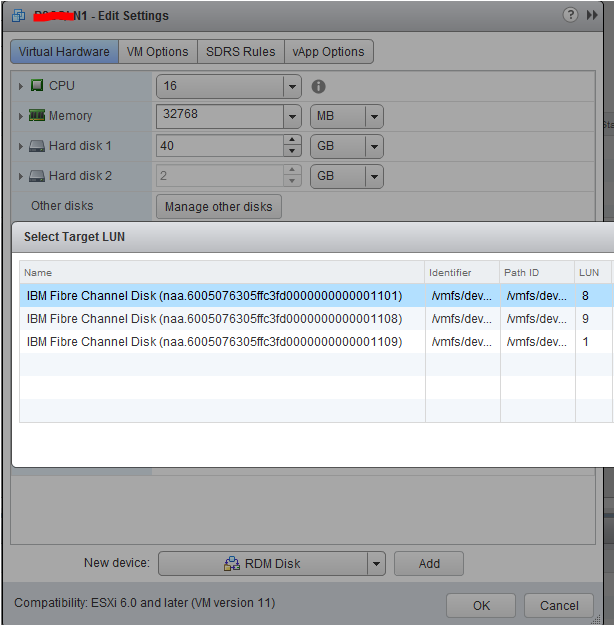
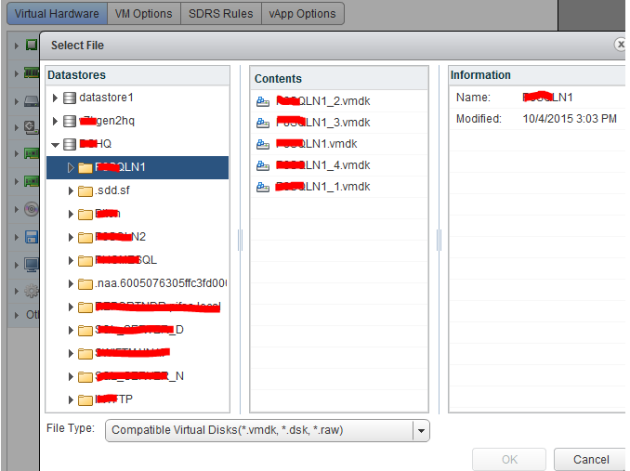
Select the shared cluster disk resources presented and available for your SQL cluster failover cluster and click Next.
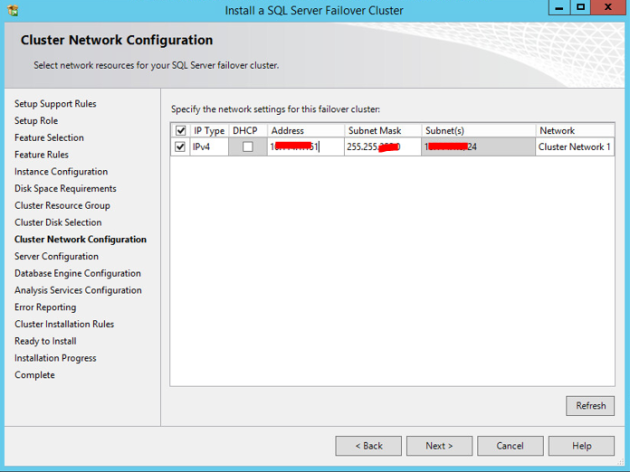
Select network resources for your SQL server failover cluster and type the IP address for the SQL server.
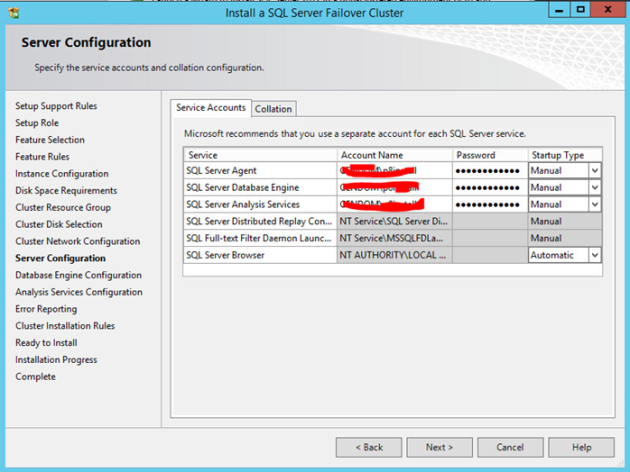
Specify the service account and password for the SQL server and click Next.
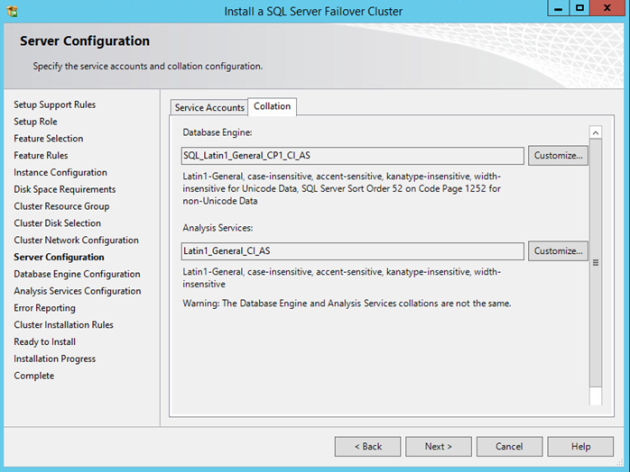
If required change the Collation, you can keep the default here and change collation when creating database. Click Next.

Specify the SQL engine authentication security mode, it is always good to choose Mixed mode unless otherwise windows authentication mode. Type the password for sa and SQL administrators. Click Next.
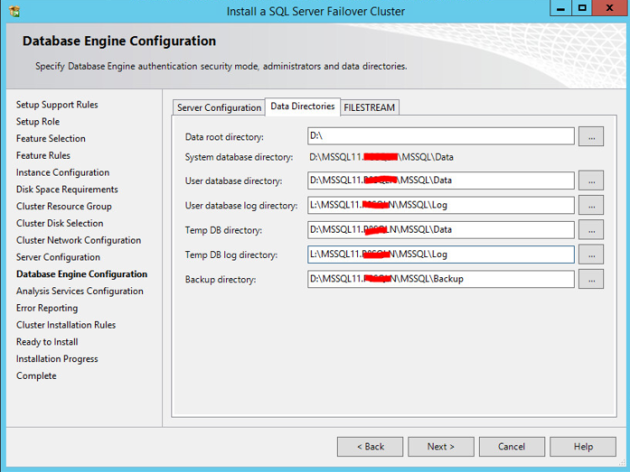
Choose Data root directory and change the database and Log drives according to the availability we have done in our previous sets. Click Next.

Add analysis services administrators. Click Next.

Specify the data directory and click Next.

Click Next.

Setup will check the failover cluster installation operation and click Next.

Check the summary of the collection of our setup consolidation and click install.
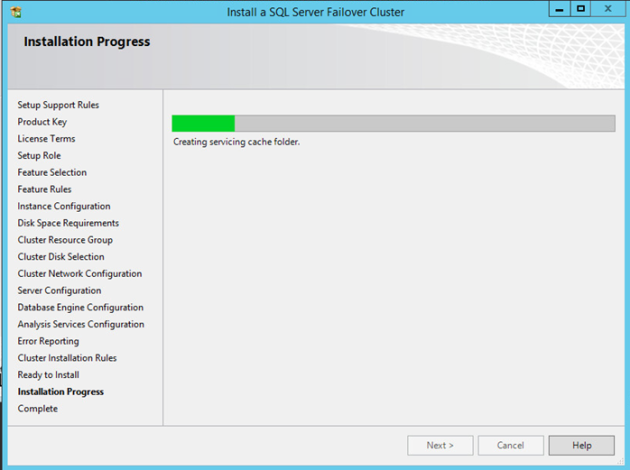
Installation progress.

Again progress…….
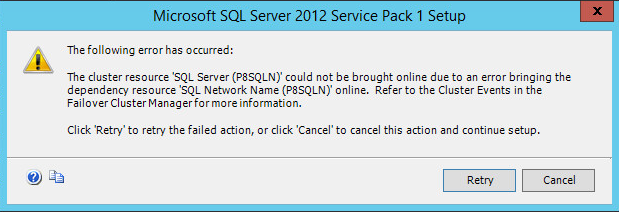
For this error you need to add the SQL virtual luster name in to AD and assign or grant Create object permission to the cluster name. And retry the setup. If your nodes are in default OU (Computer Container) then you don’t have this issue. Otherwise it requires and computer create account permission on the OU where the nodes and Cluster Name Object (CNO) are residing. Bottom-line is, the equivalent rights that are needed for this user or CNO on an OU, required are “Create Computer Objects” and “Read All Properties” and you can also delegate the cluster CNO account for “Create Computer Objects” or simply grant full control permission on MSDTC CNO account in Active Directory.
https://technet.microsoft.com/en-us/library/cc731002(v=ws.10).aspx

Now it is over and close the setup.

Open the management studio and you will have the clustered SQL 2012 ready for use.
Adding another node
Load the SQL installer media in node 2 and run the SQL setup

Select Add node to a SQL failover cluster.
Look for errors and warning and click OK.
If there is internet, then it will list eh latest update otherwise clicks Next.

Again setup is checking for errors and warning and fix accordingly and click Next.

Enter Product key and click Next

Accept the license and lick Next.
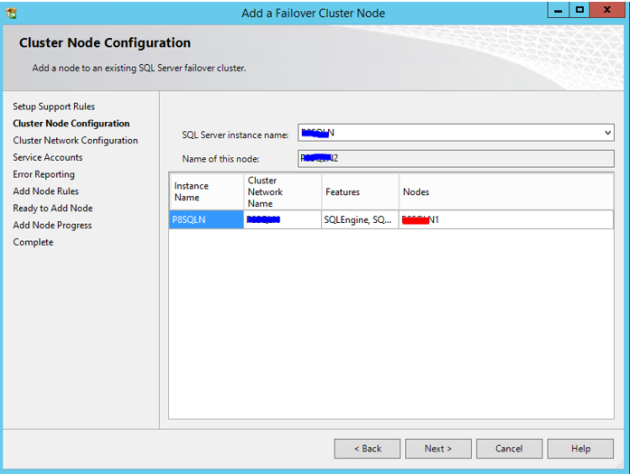
Add the node to the existing SQL failover cluster and Click Next.

Specify the IP address and click Next.

Specify the password for the service account which we have used in our first node installation and click Next.
Click Next.
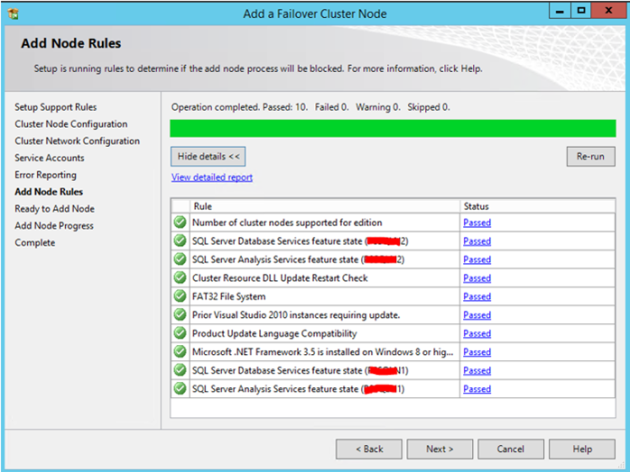
Setup will check for the nodes installation process and provide you with errors and warning. If passed then click Next.
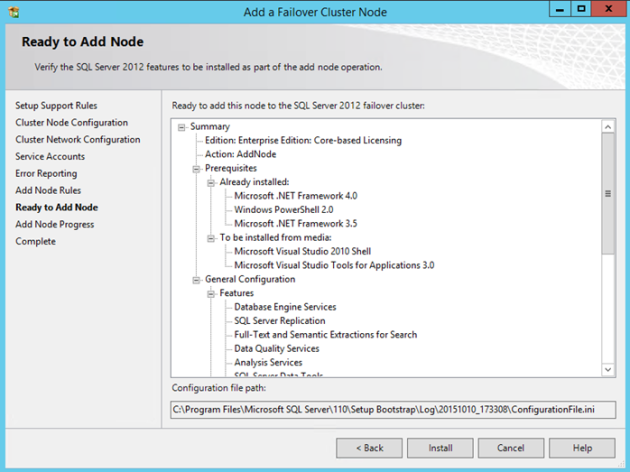
Summary for the installation steps which you have selected in the previous steps. And Click Install.
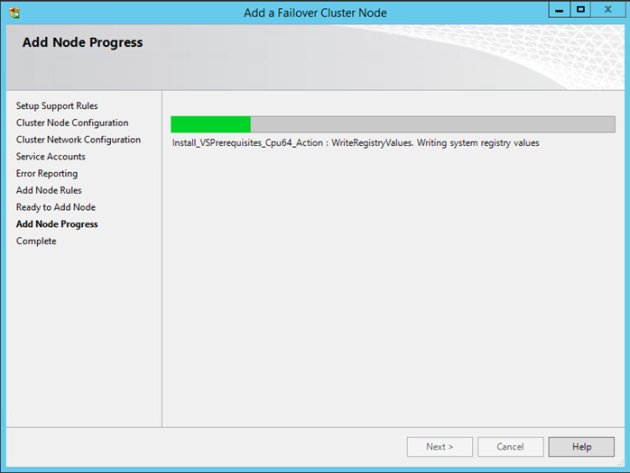
Node adding progress bar…

Again node adding Progress….

The completed node adding screen and click close. Now you will be able to access the SQL engine form node 2 also and it will failover to the other node if there is any critical issue in node 1.
By default, your Windows Cluster heartbeat connection will fail when 5 pings are lost (1 ping per second for a total of 5 seconds).
SQL 2012 SP2 update installation
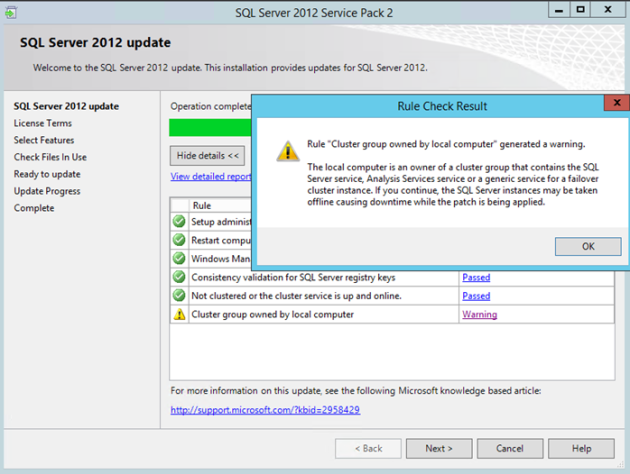
This warning you can safely ignore and click Next.

Click Next.
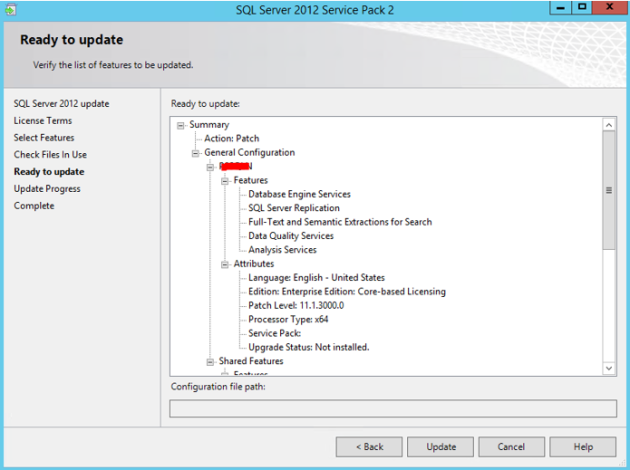
Then click Update to update the SQL installation.

Update progress….
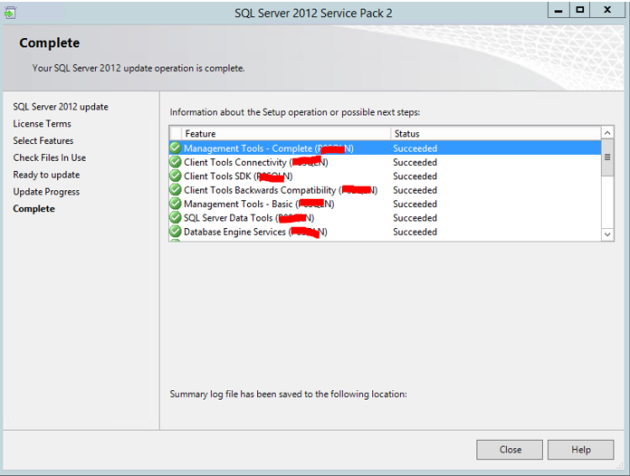
Click close to finish the update.
Before upgrade.

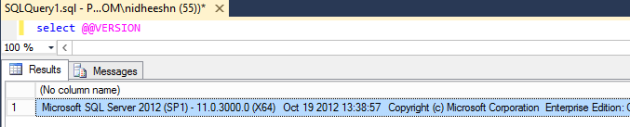
Verify the SQL update by running the @@Version query and confirm the changes.
To Configure MSDTC (Distributed Transaction Coordinator)

Go to Failover cluster Manager and select Roles and click Configure Role

Click Next

Select Distributed Transaction Coordinator (DTC) and click Next
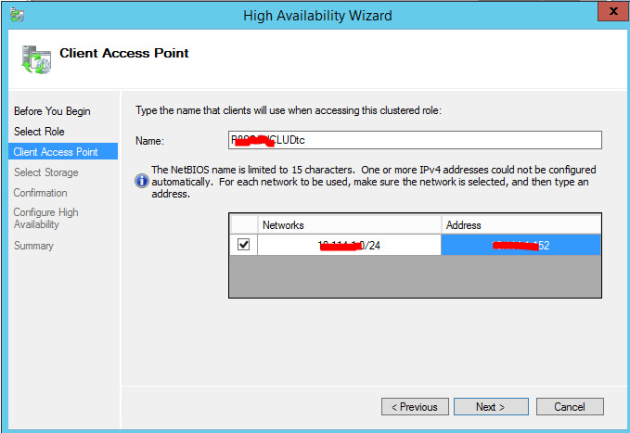
Type the Name of DTC and specify the IP address and Click Next.
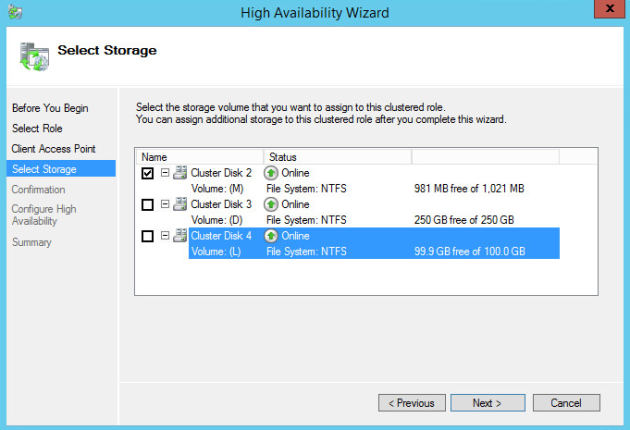
Select the Drive from the list presented by the setup wizard and click Next.

Verify the confirmation page for DTC and click Next.

View the report for the installation of DTC and click Finish.

Go to the Failover Cluster manager and Start Role.

And that is the end … please comment about and I will try to improve….


![clip_image001[4]](https://nideesh.files.wordpress.com/2012/10/clip_image0014.png "clip_image001[4]")
![clip_image002[4]](https://nideesh.files.wordpress.com/2012/10/clip_image0024.png "clip_image002[4]")
![clip_image004[4]](https://nideesh.files.wordpress.com/2012/10/clip_image0044.jpg "clip_image004[4]")
![clip_image005[4]](https://nideesh.files.wordpress.com/2012/10/clip_image0054.png "clip_image005[4]")
![clip_image007[4]](https://nideesh.files.wordpress.com/2012/10/clip_image0074.jpg "clip_image007[4]")
![clip_image008[4]](https://nideesh.files.wordpress.com/2012/10/clip_image0084.png "clip_image008[4]")
![clip_image009[4]](https://nideesh.files.wordpress.com/2012/10/clip_image0094.png "clip_image009[4]")
![clip_image010[4]](https://nideesh.files.wordpress.com/2012/10/clip_image0104.png "clip_image010[4]")
![clip_image012[4]](https://nideesh.files.wordpress.com/2012/10/clip_image0124.png "clip_image012[4]")
![clip_image013[4]](https://nideesh.files.wordpress.com/2012/10/clip_image0134.png "clip_image013[4]")
![clip_image015[4]](https://nideesh.files.wordpress.com/2012/10/clip_image0154.jpg "clip_image015[4]")
![clip_image016[4]](https://nideesh.files.wordpress.com/2012/10/clip_image0164.png "clip_image016[4]")
![clip_image018[4]](https://nideesh.files.wordpress.com/2012/10/clip_image0184.jpg "clip_image018[4]")
![clip_image020[4]](https://nideesh.files.wordpress.com/2012/10/clip_image0204.jpg "clip_image020[4]")


