How to Display Drive Space status for all the serves in our environment
It was been a difficult task to find the disk space status for all the serves in our data center or domain unless and until you don’t a have a right monitoring tool. Many organizations have these types of utility and monitoring programs. In this article we will discuss some script to find the disk space status report with less effort and if you tune your script mentioned in this article properly you will have a professional presentable html or other format reports with all, the details.
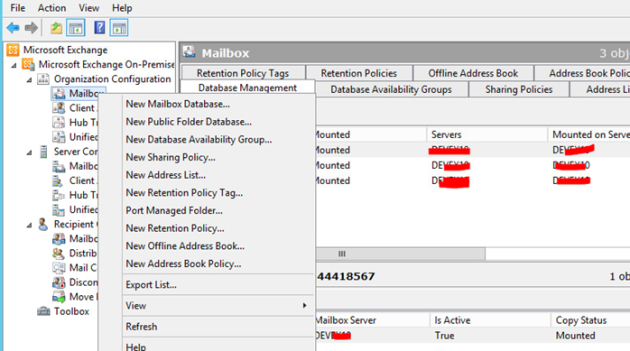
Go to Accessories and Windows Power Shell and click the mode you like Shell or ISE

In shell mode

In ISE mode open the script in power shell and run it either by press F5 or press the Green Play Button.

In both case you will see the result.
Now the Script below will send the drive space status in your email which you have configured in the script. Copy the script below and same as DriveSpaceReportEmail.ps1 by using any editor like notepad or notepad ++ etc. This script is very easy to make changes according to your environment and setup. This PowerShell script is working and I have used it for many of my customer site and became a hero in span of time!!!
#________ Script start here __________#
# Author: Nidheesh Nattiala
# Continue even if there are errors
$ErrorActionPreference = "Continue";
#########################################################################################
# Items to change to make it work for you.
#
# EMAIL PROPERTIES
# – the $users that this report will be sent to.
# – near the end of the script the smtpserver, From and Subject.
# REPORT PROPERTIES
# – you can edit the report path and report name of the html file that is the report.
#########################################################################################
# Set your warning and critical thresholds
$percentGood = 60;
$percentWarning = 50;
$percentCritcal = 10;
# EMAIL PROPERTIES
# Set the recipients of the report.
$users = "nidheesh@dkeysolutions.com"
# $cc = "nidheesh@dkeysolutions.com", "nideesh@gmail.com", "nidheesh@live.com"
$cc = "diskusage@dkeysolutions.com"
#$users = "nidheesh@dkeysolutions.com" # I use this for testing by using my email address.
#$users = "nidheesh@dkeysolutions.com", "nideesh@gmail.com", "nidheesh@live.com"; # can be sent to individuals.
# REPORT PROPERTIES
# Path to the repor. This is where the report will save to!
$reportPath = "N:\\DiskspaceReport";
# Report name
$reportName = $datetime + "index.html";
# Path and Report name together
$diskReport = $reportPath + $reportName
#Set colors for table cell backgrounds
$redColor = "#FF0000"
$orangeColor = "#FBB917"
$greenColor = "#11EB35"
$whiteColor = "#FFFFFF"
# Count if any computers have low disk space. Do not send report if less than 1.
$i = 0;
# SERVER LIST PROPERTIES
# Get computer list to check disk space. This is just a plain text file with the servers listed out.
$computers = Get-Content "N:\DiskspaceReport\Servers\Servers.txt";
#$computers = Get-QADComputer-OSname *Server* |Select -ExpandProperty name
$datetime = Get-Date -Format "MM-dd-yyyy_HHmmss";
# Remove the report if it has already been run today so it does not append to the existing report
If (Test-Path $diskReport)
{
Remove-Item $diskReport
}
# Cleanup old files..
$Daysback = "-7"
$CurrentDate = Get-Date;
$DateToDelete = $CurrentDate.AddDays($Daysback);
Get-ChildItem $reportPath | Where-Object { $_.LastWriteTime -lt $DatetoDelete } | Remove-Item;
# HTML PROPERTIES
# Create and write HTML Header of report
$titleDate = get-date -uformat "%m-%d-%Y – %A"
$header = "
<html>
<head>
<meta http-equiv=’Content-Type’ content=’text/html; charset=iso-8859-1′>
<title>Dkey Solutions – DiskSpace Report</title>
<STYLE TYPE=’text/css’>
<!–
td {
font-family: Tahoma;
font-size: 11px;
border-top: 1px solid #999999;
border-right: 1px solid #999999;
border-bottom: 1px solid #999999;
border-left: 1px solid #999999;
padding-top: 0px;
padding-right: 0px;
padding-bottom: 0px;
padding-left: 0px;
}
body {
margin-left: 5px;
margin-top: 5px;
margin-right: 0px;
margin-bottom: 10px;
table {
border: thin solid #000000;
}
–>
</style>
</head>
<body>
<table width=’100%’>
<tr bgcolor=’#CCCCCC’>
<td colspan=’7′ height=’25’ align=’center’>
<font face=’tahoma’ color=’#003399′ size=’4′><strong>DkeySolutions – DiskSpace Report for $titledate</strong></font>
</td>
</tr>
</table>
"
Add-Content $diskReport $header
# Create and write Table header for report
$tableHeader = "
<table width=’100%’><tbody>
<tr bgcolor=#CCCCCC>
<td width=’10%’ align=’center’>Server</td>
<td width=’5%’ align=’center’>Drive</td>
<td width=’15%’ align=’center’>Drive Label</td>
<td width=’10%’ align=’center’>Total Capacity(GB)</td>
<td width=’10%’ align=’center’>Used Capacity(GB)</td>
<td width=’10%’ align=’center’>Free Space(GB)</td>
<td width=’5%’ align=’center’>Freespace %</td>
</tr>
"
Add-Content $diskReport $tableHeader
# Start processing disk space reports against a list of servers
foreach($computer in $computers)
{
$disks = Get-WmiObject -ComputerName $computer -Class Win32_LogicalDisk -Filter "DriveType = 3"
$computer = $computer.toupper()
foreach($disk in $disks)
{
$deviceID = $disk.DeviceID;
$volName = $disk.VolumeName;
[float]$size = $disk.Size;
[float]$freespace = $disk.FreeSpace;
$percentFree = [Math]::Round(($freespace / $size) * 100, 2);
$sizeGB = [Math]::Round($size / 1073741824, 2);
$freeSpaceGB = [Math]::Round($freespace / 1073741824, 2);
$usedSpaceGB = $sizeGB – $freeSpaceGB;
$color = $whiteColor;
# Set background color to Green if it is Healthy
#if($percentFree -lt $percentGood)
# {
#$color = $greenColor
# Set background color to Orange if just a warning
if($percentFree -lt $percentWarning)
{
$color = $orangeColor
# Set background color to Orange if space is Critical
if($percentFree -lt $percentCritcal)
{
$color = $redColor
}
# Create table data rows
$dataRow = "
<tr>
<td width=’10%’>$computer</td>
<td width=’5%’ align=’center’>$deviceID</td>
<td width=’15%’ >$volName</td>
<td width=’10%’ align=’center’>$sizeGB</td>
<td width=’10%’ align=’center’>$usedSpaceGB</td>
<td width=’10%’ align=’center’>$freeSpaceGB</td>
<td width=’5%’ bgcolor=`’$color`’ align=’center’>$percentFree</td>
</tr>
"
Add-Content $diskReport $dataRow;
Write-Host -ForegroundColor DarkYellow "$computer $deviceID percentage free space = $percentFree";
$i++
}
}
}
# Create table at end of report showing legend of colors for the critical and warning
$tableDescription = "
</table><br><table width=’20%’>
<tr bgcolor=’White’>
#<td width=’10%’ align=’center’ bgcolor=’#11EB35′>Healthy less than 75% free space</td>
<td width=’10%’ align=’center’ bgcolor=’#FBB917′>Warning less than 15% free space</td>
<td width=’10%’ align=’center’ bgcolor=’#FF0000′>Critical less than 10% free space</td>
</tr>
"
Add-Content $diskReport $tableDescription
Add-Content $diskReport "</body></html>"
# Send Notification if alert $i is greater than 0
if ($i -gt 0)
{
foreach ($user in $users)
{
Write-Host "Sending Email notification to $user"
# SMTP PROPERTIES
# SMTP Server settings that will allow the report to be emailed to you which has SMTP enabled
$smtpServer = "mail.dkeysolutions.com"
$smtp = New-Object Net.Mail.SmtpClient($smtpServer)
$msg = New-Object Net.Mail.MailMessage
$msg.To.Add($user)
$msg.CC.Add($cc)
$msg.From = "diskusage@dkeysolutions.com"
$msg.Subject = "Dkey Solutions Environment DiskSpace Report for $titledate"
$msg.IsBodyHTML = $true
$msg.Body = get-content $diskReport
$smtp.Send($msg)
$body = "Report completed."
}
}
#________________End of the Script_________________
The Email will be some this like this

This is another script which I like most because this has some nice Graphic bar and it has a nice view. . Copy the script below and same as DriveSpaceReportGraph.ps1 by using any editor like notepad or notepad ++ etc. change the location of the report file and other setting according to your need.
#________ Script start here __________#
#script will open web browser with current report when completed.
# Author: Nidheesh Nattiala
Param (
$computers = (Get-Content "N:\DiskspaceReport\Servers.txt")
)
$Title="Hard Drive Report to HTML"
#embed a stylesheet in the html header
$head = @"
<mce:style><!–
mce:0
–></mce:style><style _mce_bogus="1"><!–
mce:0
–></style>
<Title>$Title</Title>
<br>
"@
# EMAIL PROPERTIES
# Set the recipients of the report.
#$users = "nidheesh@dkeysolutions.com"
# $cc = "nideesh@gmail.com", "nidheesh@live.com"
#$cc = "diskusage@dkeysolutions.com"
#$users = "nidheesh@dkeysolutions.com" # I use this for testing by using my email address.
#$users = "nideesh@gmail.com", "nidheesh@live.com"; # can be sent to individuals.
#define an array for html fragments
$fragments=@()
#gets the drive data
$data=Get-WmiObject -Class Win32_logicaldisk -filter "drivetype=3" -computer $computers
#group data by computername
$groups=$Data | Group-Object -Property SystemName
#this is the graph character
[string]$g=[char]9608
#create html fragments for each computer
#iterate through each group object
ForEach ($computer in $groups) {
$fragments+="<H2>$($computer.Name)</H2>"
#define a collection of drives from the group object
$Drives=$computer.group
#create an html fragment
$html=$drives | Select @{Name="Drive";Expression={$_.DeviceID}},
@{Name="SizeGB";Expression={$_.Size/1GB -as [int]}},
@{Name="UsedGB";Expression={"{0:N2}" -f (($_.Size – $_.Freespace)/1GB) }},
@{Name="FreeGB";Expression={"{0:N2}" -f ($_.FreeSpace/1GB) }},
@{Name="Usage";Expression={
$UsedPer= (($_.Size – $_.Freespace)/$_.Size)*100
$UsedGraph=$g * ($UsedPer/2)
$FreeGraph=$g* ((100-$UsedPer)/2)
#I’m using place holders for the < and > characters
"xopenFont color=Redxclose{0}xopen/FontxclosexopenFont Color=Greenxclose{1}xopen/fontxclose" -f $usedGraph,$FreeGraph
}} | ConvertTo-Html -Fragment
#replaces the tag place holders. It is a hack but it works.
$html=$html -replace "xopen","<"
$html=$html -replace "xclose",">"
#add to fragments
$Fragments+=$html
#insert a return between each computer
$fragments+="<br>"
} #foreach computer
#add a footer
$footer=("<br><I>Report run {0} by {1}\{2}<I>" -f (Get-Date -displayhint date),$env:userdomain,$env:username)
$fragments+=$footer
#writes the result to a file
$Path = "N:\DiskspaceReport\DriveSpacereport.htm"
ConvertTo-Html -head $head -body $fragments | Out-File $Path
#_______________End of the Script______________
The end result will be something like this.

Both of the script above is tested and is working and the reference I have taken for this script is form Microsoft script center. All what you have to do is to change the smtp server and email address according to your environment. Also you have to change the path of the files for the reports and the server list file. Bothe above script will run based on the computer names provided in the list mentioned in server.txt file. Computer name will be read by the script line by line so arrange the name according to in the text file. You can use task seclude in windows to schedule this script to run automatically in an agreed time frame like weekly or monthly etc., for that you have to create a batch file and use this batch file and run your script. Create a batch called DiskSpaceReport.cmd with the line below:-
powershell.exe “N:\DiskspaceReport\DiskSpaceReport.ps1"
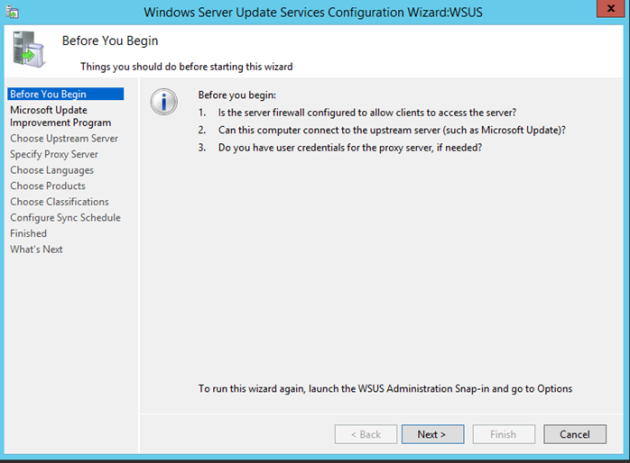
Below are some screens about schedule task in Windows8, (Windows Server 2012 is also same) here you can search in settings, you can go ahead and Create Basic Task, rest of the steps is self-explanatory and easy to go…


Try this PowerShell script and customize according to your requirement and avoid low disk space issue especially on Database and File Servers.